
Seconds matter when drawing from concealment. In this video, Grant LaVelle, Firearm Instructor at GunSpot, shares his top tips for a fast, consistent, and safe draw from the appendix carry position.
Great Gear
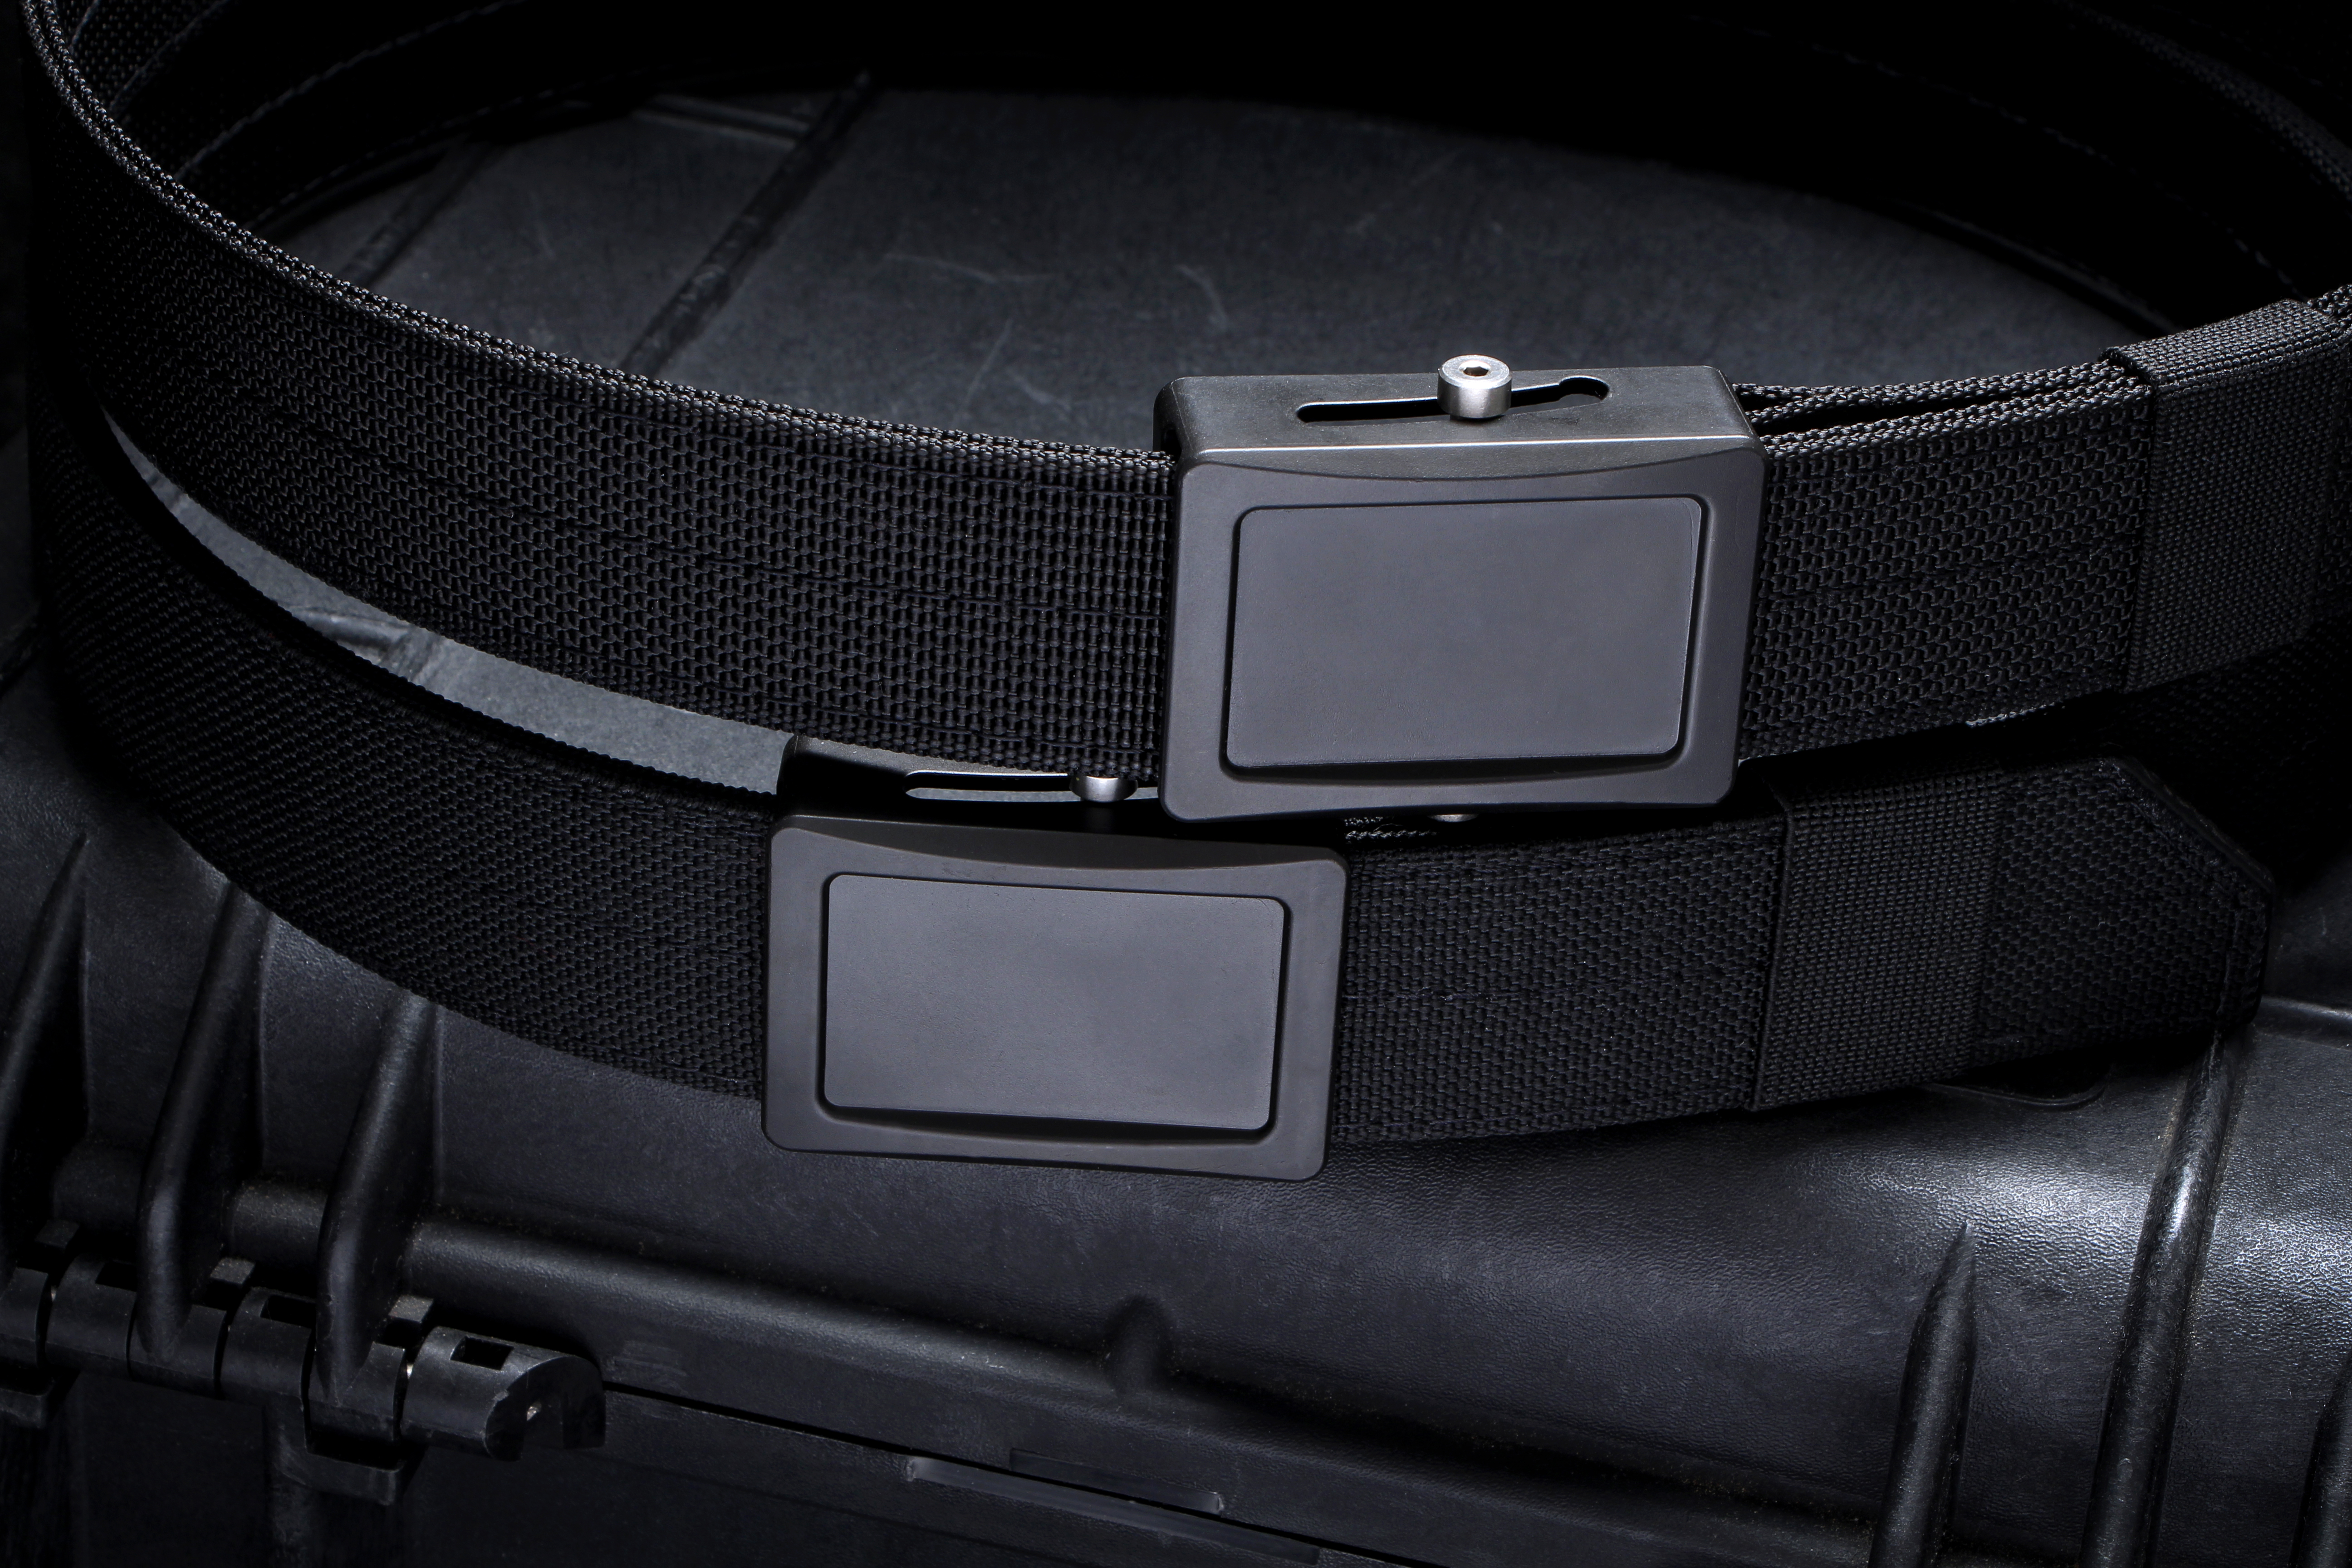
The first thing to consider is to have a proper belt designed for concealed carry. These belts are stiff and often reinforced. This foundational step will ensure there is no sag giving you a more consistent draw. Second, you will want a quality holster. In this video, we used the OATH holster paired with Grant's GLOCK 17.
Clear The Way
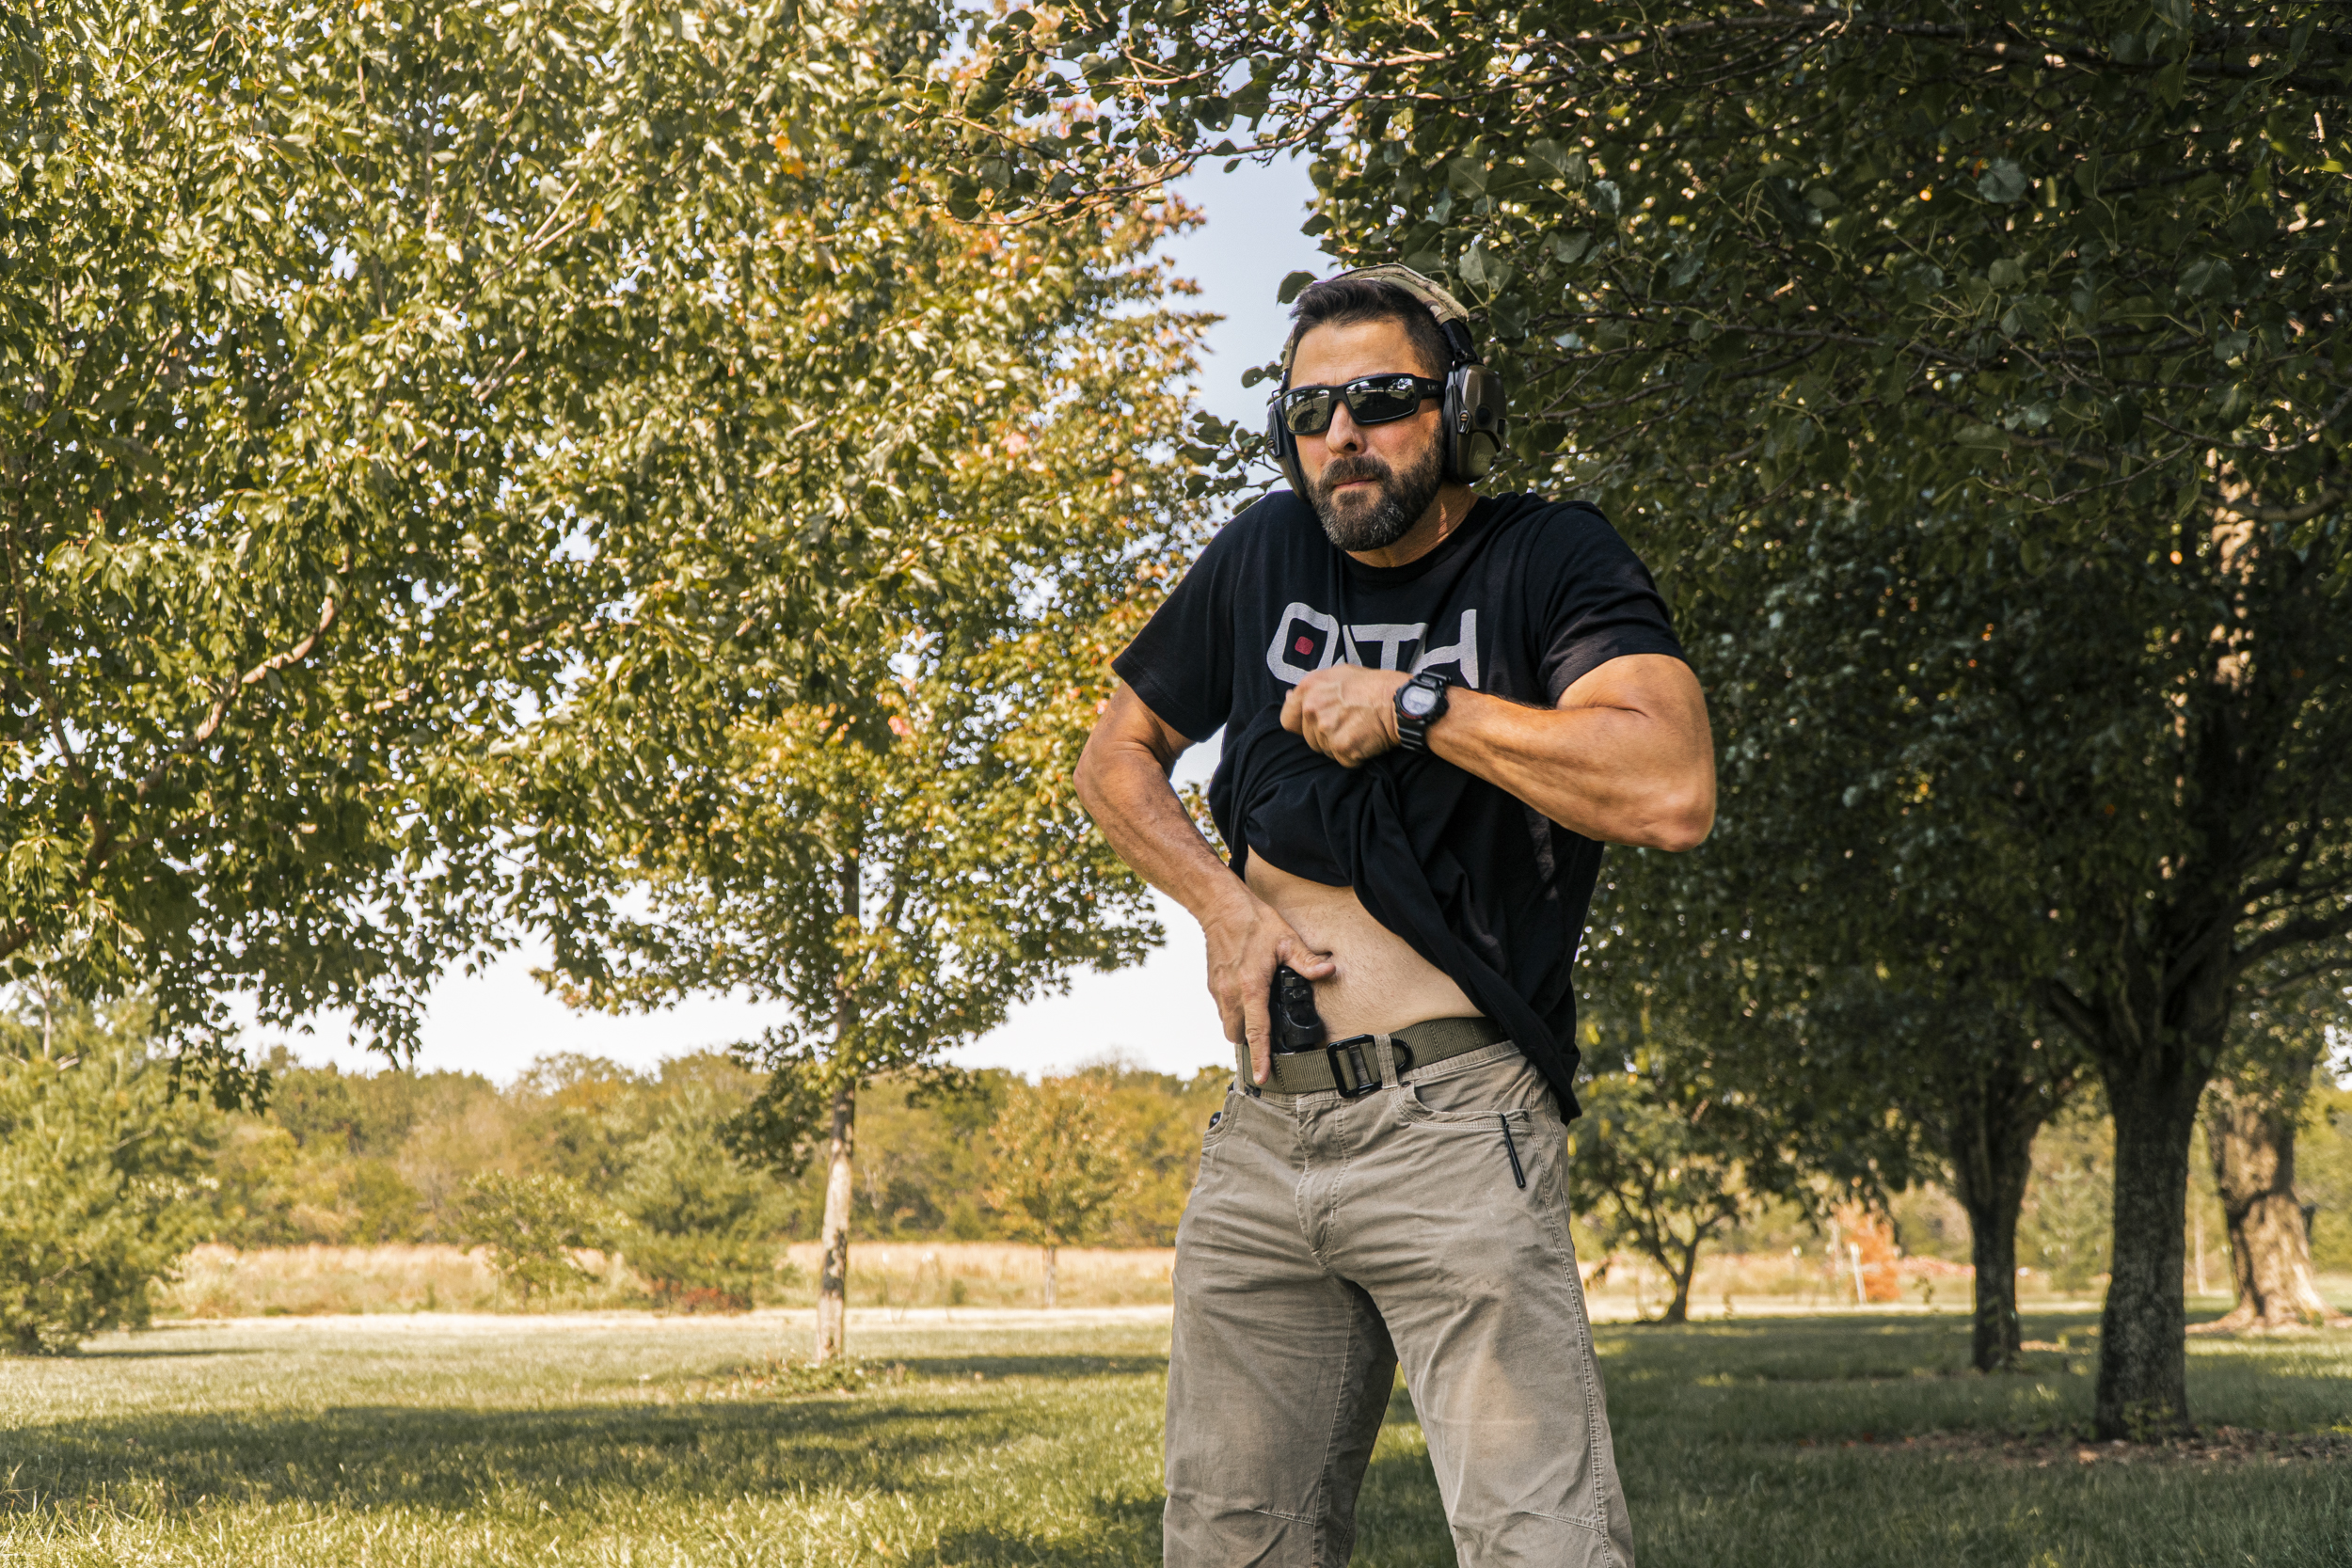
When concerning the actual draw stroke, the first thing you have to do is clear the garment. In other words, you need to get your shirt out of the way so you can get a solid grip on your gun. Grab your shirt directly above the firearm and then lift and rotate it across your body away from your gun. This technique will help you not snag your thumb on your garment as you move to grip the weapon.
![]()
Get A Grip
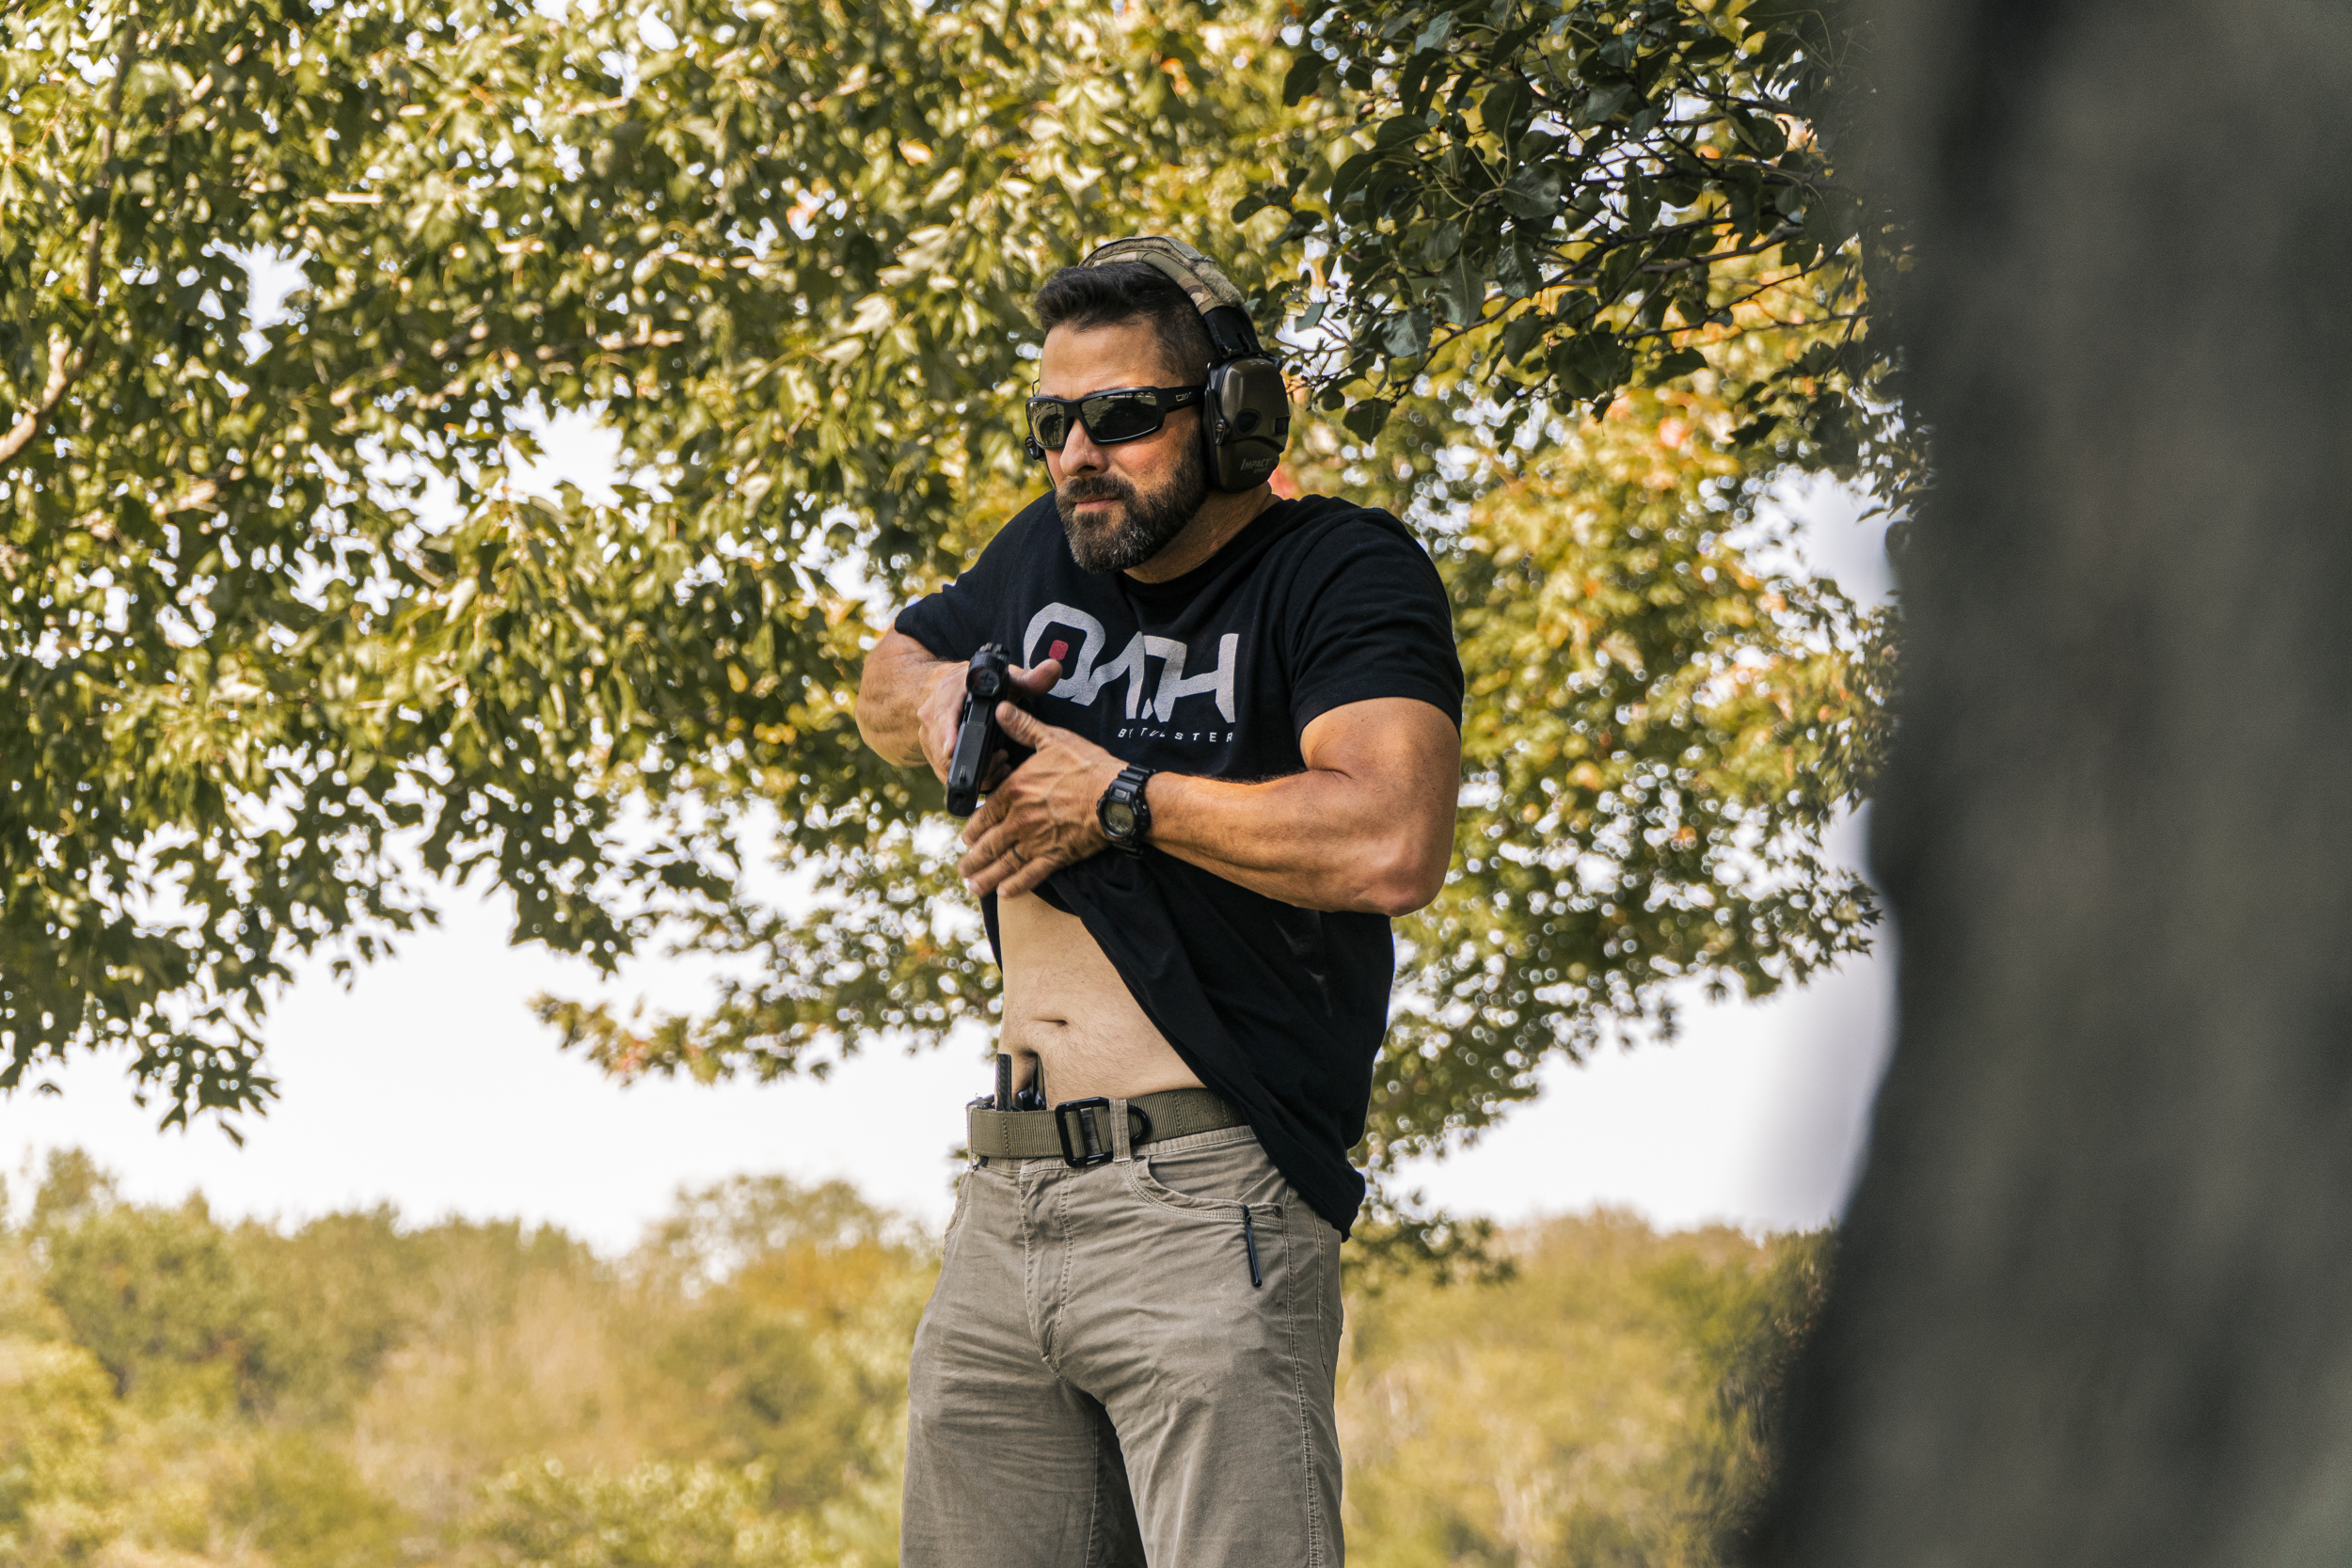
In your training, when it comes to gripping the gun, make sure you're intentional about getting a solid grip on the gun. That means having the web of your hand placed high on the grip. If you have to, as you practice, make this a stopping point and slow down your draw in practice. It's essential to build good muscle memory for your grip. When the pressure is on, and you have to draw fast, you will do it with excellence. Don't let yourself have a bad grip before you draw, and then try to fix it once the gun is out of the holster. That will be a recipe for disaster in a defense situation.
Practice Your Press
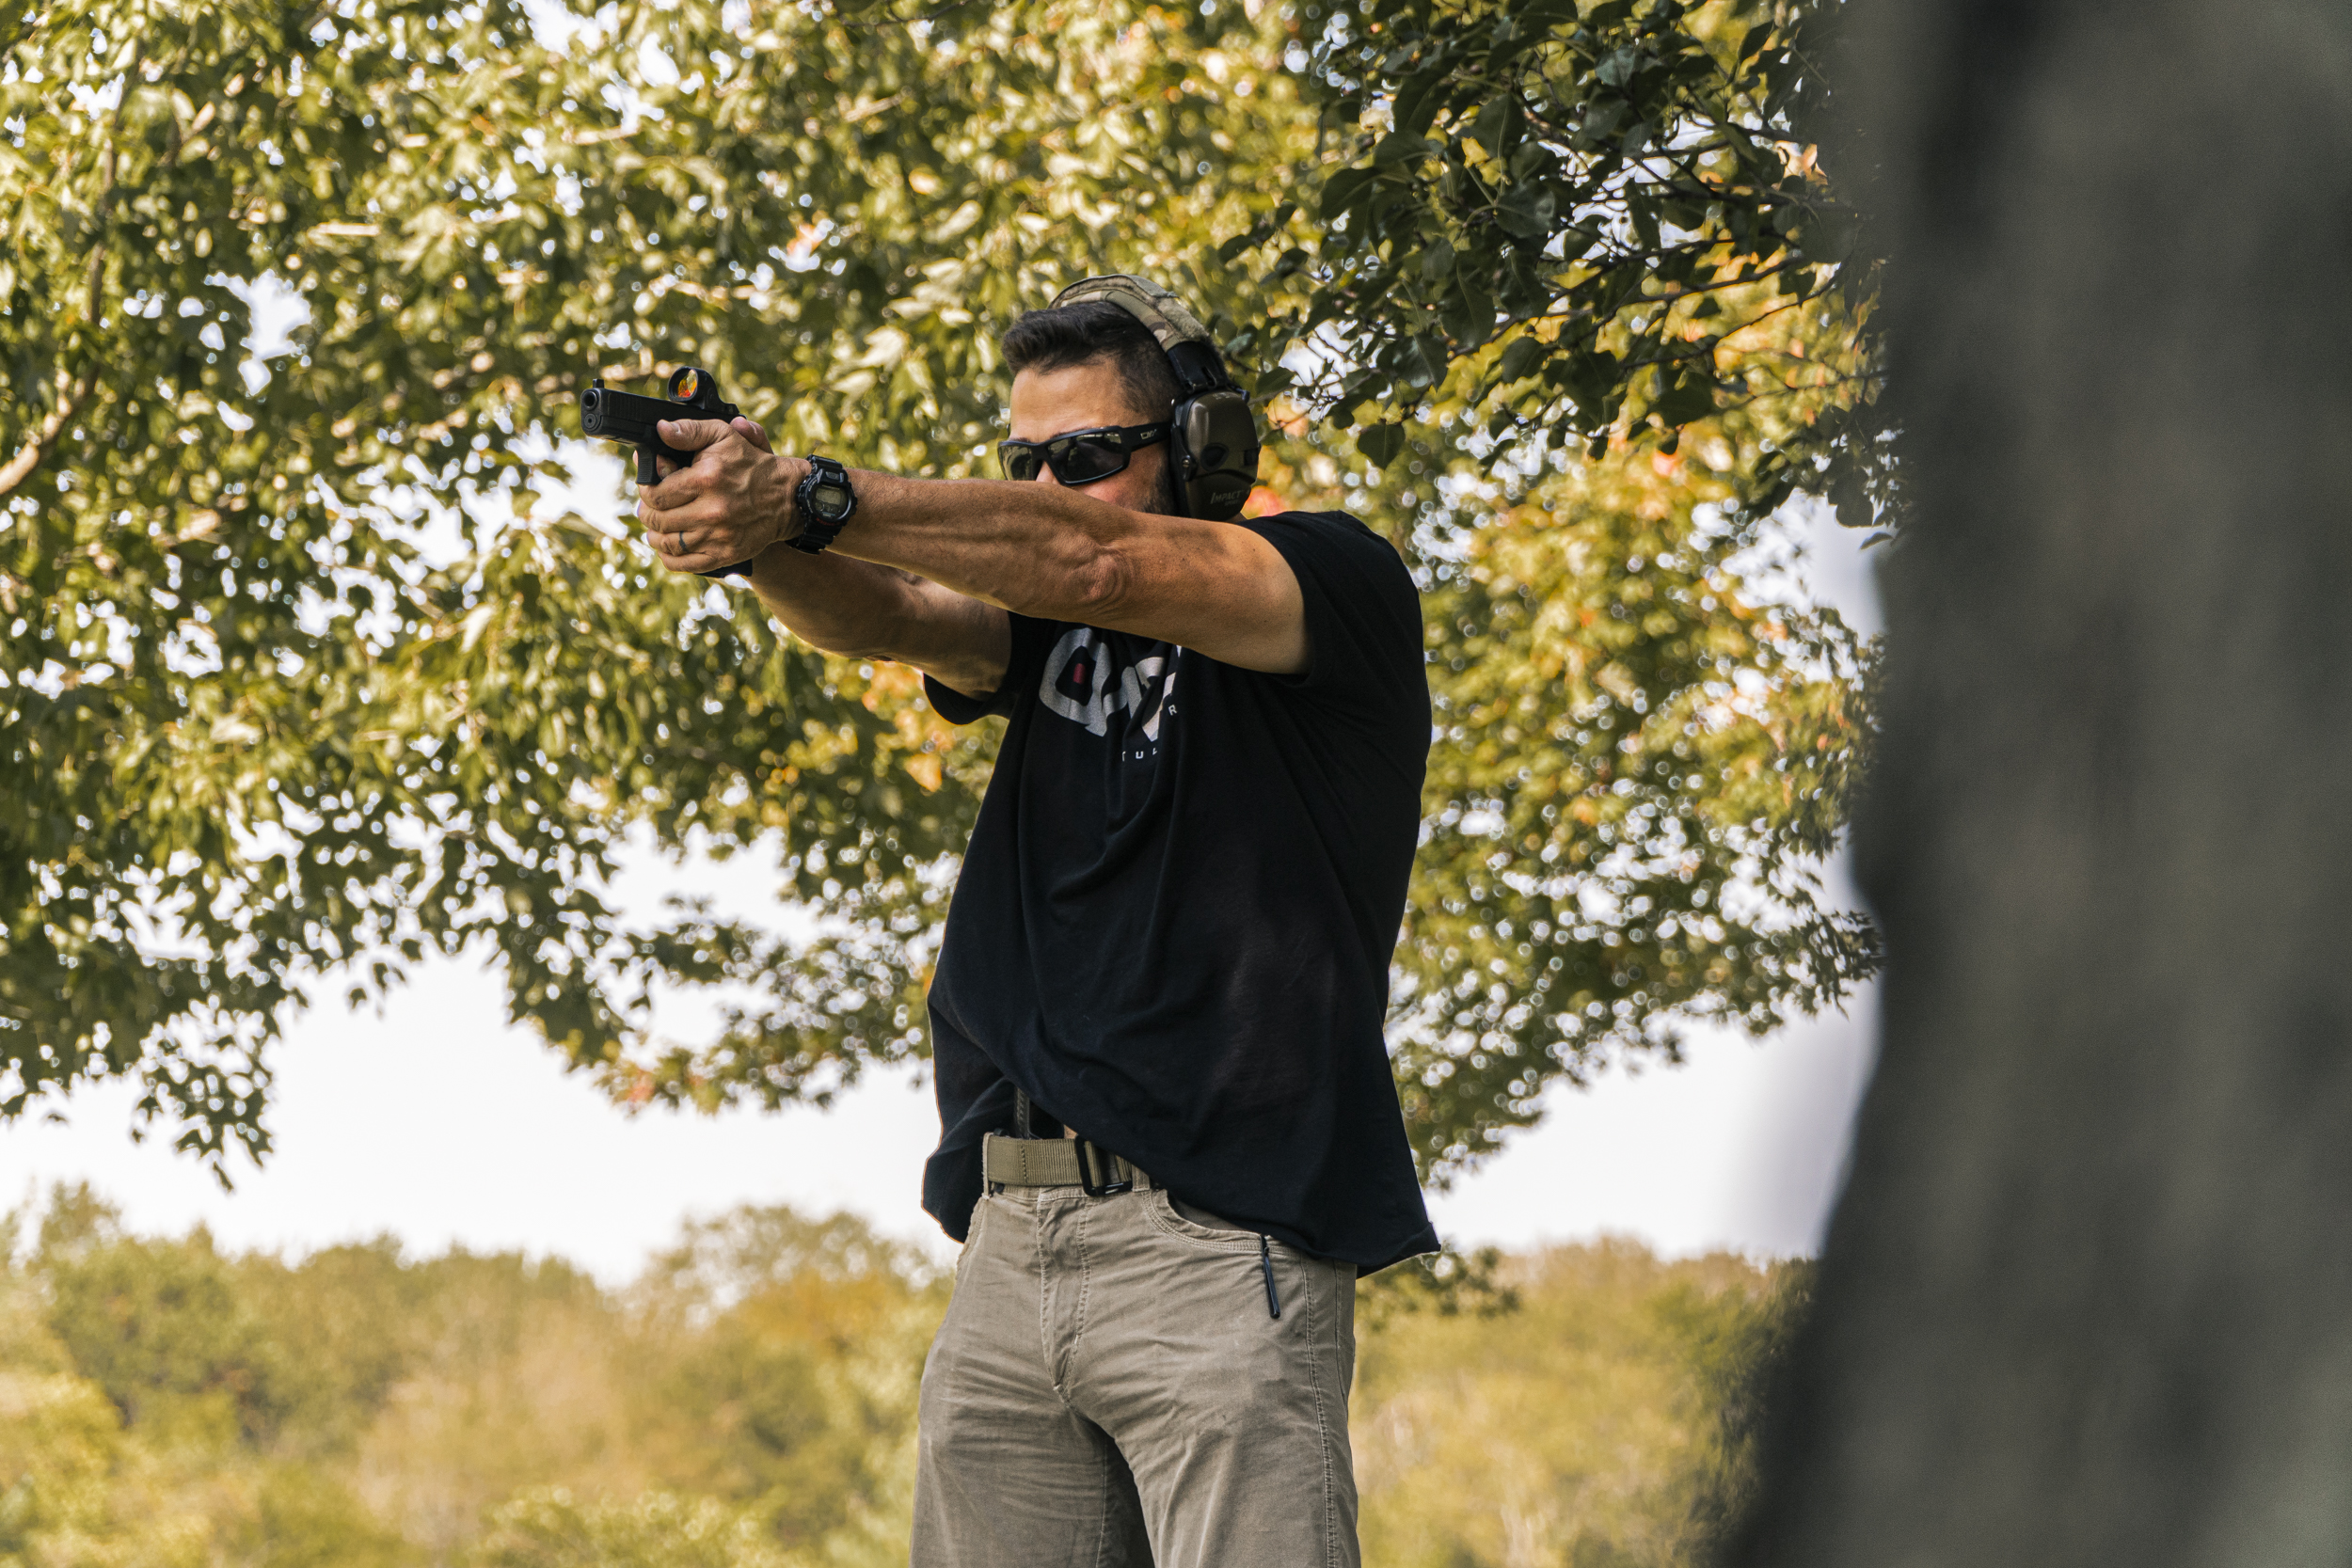
Once you have a firm grip, draw the gun up and rotate the muzzle toward your target as you move the gun up. Make yourself get the gun pointed downrange as soon as it clears the holster; you want the gun pointed at the threat as quickly as possible. From that point, Grant teaches a high sight press. To use a high sight press, you draw the gun, rotate the muzzle at the threat, and lift it to your chest while keeping it close to your body. From that position, press the firearm out with both hands in the direction of the threat. Pressing the gun out from this height will help you see your front sight as you present out onto the target. One of the reasons Grant teaches to keep the gun close to you until you press out on the target is so that the weapon isn't something easy for the threat to knock from your hand or grab. If it's close, you retain control of it. After the gun is out and the sights are on target, that's when you take a shot if the situation needs it.
Keep Control
From that point, Grant teaches a high sight press. To use a high sight press, you draw the gun, rotate the muzzle at the threat, and lift it up to your chest all while keeping it close to your body. Then once the gun is up with both hands, press it out onto the threat. Pressing the gun out from this height will help you see your front sight as you present out onto the target. One of the reasons Grant teaches to keep the gun close to you until you press out on the target is so that the gun isn’t something easy for the threat to knock from your hand or grab. If it's close, you retain control of it. After the gun is out and the sights are on target, that’s when you fire a shot if the situation needs it.
Check out our full video on this subject to see Grant explain this in action. Remember to practice as often as you can. Practicing with an unloaded weapon at home is where a safe, efficient and fast draw stroke will be built. So get a good belt, a good holster and start getting in some repetitions!